Seven Story Rabbit Hole

Sometimes awesome things happen in deep rabbit holes. Or not.

   images

Configuring InfluxDB and Grafana With Go Client Library

Create a beautiful Grafana dashboard with realtime performance stats:

screen shot 2016-09-13 at 3 33 20 pm

Install InfluxDB and Grafana

1
2
3
4
brew install influxdb grafana telegraf
brew services start influxdb
brew services start grafana
brew services start telegraf

Versions at the time of this writing:

  • InfluxDB: 1.0
  • Grafana: 3.1.1

Verify

  • The Grafana Web UI should be available at localhost:3000 — login with admin/admin
  • The InfluxDB Web UI should be available at localhost:8083

Create database on influx

Create db named “db”

1
2
$ influx
> create database db

Edit telegraf conf

Open /usr/local/etc/telegraf.conf in your favorite text editor and uncomment the entire statsd server section:

1
2
3
4
5
6
# Statsd Server
[[inputs.statsd]]
  ## Address and port to host UDP listener on
  service_address = ":8125"

  .. etc .. 

Set the database to use the “db” database created earlier, under the outputs.influxdb section of the telegraf config

1
2
3
4
5
6
7
8
[[outputs.influxdb]]
  ## The full HTTP or UDP endpoint URL for your InfluxDB instance.
  ## Multiple urls can be specified as part of the same cluster,
  ## this means that only ONE of the urls will be written to each interval.
  # urls = ["udp://localhost:8089"] # UDP endpoint example
  urls = ["http://localhost:8086"] # required
  ## The target database for metrics (telegraf will create it if not exists).
  database = "db" # required

Restart telegraf

1
brew services restart telegraf

Create Grafana Data Source

  • Open the Grafana Web UI in your browsers (login with admin/admin)
  • Use the following values:

screen shot 2016-09-13 at 3 39 43 pm

Create Grafana Dashboard

  • Go to Dashboards / + New
  • Click the green thing on the left, and choose Add Panel / Graph

screen shot 2016-09-13 at 3 43 50 pm

  • Delete the test metric, which is not needed, by clicking the trash can to the right of “Test Metric”

screen shot 2016-09-13 at 3 45 04 pm

  • Under Panel / Datasource, choose db, and then hit + Add Query, you will end up with this

screen shot 2016-09-13 at 3 47 21 pm

Push sample data point from command line

In order for the field we want to show up on the grafana dashboard, we need to push some data points to the telegraf statds daemon.

Run this in a shell to push the foo:1|c data point, which is a counter with value increasing by 1 on the key named “foo”.

1
while true; do echo "foo:1|c" | nc -u -w0 127.0.0.1 8125; sleep 1; echo "pushed data point"; done

Create Grafana Dashboard, Part 2

  • Under select measurement, choose foo from the pulldown
  • On the top right of the screen near the clock icon, choose “Last 5 minutes” and set Refreshing every to 5 seconds
  • You should see your data point counter being increased!

screen shot 2016-09-13 at 3 51 16 pm

Add Go client library and push data points

Here’s how to update to your golang application to push new datapoints.

  • Install the g2s client library via:
1
$ go get github.com/peterbourgon/g2s
  • Here is some sample code to push data points to the statds telegraf process from your go program:
1
2
3
4
5
6
7
8
9
10
statdsClient, err := g2s.Dial("udp", "http://localhost:8125")
if err != nil {
  panic("Couldn't connect to statsd!")
}
req, err := http.NewRequest("GET", "http://waynechain.com/")
resp, err := http.DefaultClient.Do(req)
if err != nil {
  return err
}
s.StatsdClient.Timing(1.0, "open_website", time.Since(startTime))

This will push statsd “timing” data points under the key “open_website”, with the normal sample rate (set to 0.1 to downsample and only take every 10th sample). Run the code in a loop and it will start pushing stats to statsd.

Now, create a new Grafana dashboard with the steps above, but from the select measurement field choose open_website, and under SELECT choose field (mean) instead of field (value).

Go Race Detector Gotcha With Value Receivers

I ran into the following race detector error:

1
2
3
4
5
6
7
8
9
10
11
12
WARNING: DATA RACE
Write by goroutine 44:
  github.com/couchbaselabs/sg-replicate.stateFnActiveFetchCheckpoint()
      /Users/tleyden/Development/gocode/src/github.com/couchbaselabs/sg-replicate/replication_state.go:53 +0xb1d
  github.com/couchbaselabs/sg-replicate.(*Replication).processEvents()
      /Users/tleyden/Development/gocode/src/github.com/couchbaselabs/sg-replicate/synctube.go:120 +0xa3

Previous read by goroutine 27:
  github.com/couchbaselabs/sg-replicate.(*Replication).GetStats()
      <autogenerated>:24 +0xef
  github.com/couchbase/sync_gateway/base.(*Replicator).populateActiveTaskFromReplication()
      /Users/tleyden/Development/gocode/src/github.com/couchbase/sync_gateway/base/replicator.go:241 +0x145

Goroutine 44 was running this code:

1
2
3
func (r *Replication) shutdownEventChannel() {
  r.EventChan = nil
}

and nil’ing out the r.EventChan field.

While goroutine 27 was calling this code on the same *Replication instance:

1
2
3
func (r Replication) GetStats() ReplicationStats {
  return r.Stats
}

It didn’t make sense, because they were accessing different fields of the Replication — one was writing to r.EventChan while the other was reading from r.Stats.

Then I changed the GetStats() method to this:

1
2
3
func (r Replication) GetStats() ReplicationStats {
  return ReplicationStats{}
}

and it still failed!

I started wandering around the Couchbase office looking for help, and got Steve Yen to help me.

He was asking me about using a pointer receiver vs a value receiver here, and then we realized that by using a value reciever it was copying all the fields, and therefore reading all of the fields, including the r.EventChan field that the other goroutine was concurrently writing to! Hence, the data race that was subtly caused by using a value receiver..

The fix was to convert this over to a pointer reciever, and the data race disappeared!

1
2
3
func (r *Replication) GetStats() ReplicationStats {
     return r.Stats
}

Setting Up a Self-hosted drone.io CI Server

Spin up AWS server

  • Ubuntu Server 14.04 LTS (HVM), SSD Volume Type – ami-fce3c696
  • m3.medium
  • 250MB magnetic storage

Install docker

ssh ubuntu@<aws-instance> and install docker

Register github application

Go to github and register a new OAuth application using the following values:

It will give you a Client ID and Client Secret

Create /etc/drone/dronerc config file

On the ubuntu host:

1
2
$ sudo mkdir /etc/drone
$ emacs /etc/drone/dronerc

Configure Remote Driver

Add these values:

1
2
REMOTE_DRIVER=github
REMOTE_CONFIG=https://github.com?client_id=${client_id}&client_secret=${client_secret}

and replace client_id and client_secret with the values returned from github.

Configure Database

Add these values:

1
2
DATABASE_DRIVER=sqlite3
DATABASE_CONFIG=/var/lib/drone/drone.sqlite

Run Docker container

1
2
3
4
5
6
7
8
9
sudo docker run \
  --volume /var/lib/drone:/var/lib/drone \
  --volume /var/run/docker.sock:/var/run/docker.sock \
  --env-file /etc/drone/dronerc \
  --restart=always \
  --publish=80:8000 \
  --detach=true \
  --name=drone \
  drone/drone:0.4

Check the logs via docker logs <container-id> and they should look something like this

Edit AWS security group

With your instance selected, look for the security groups in the instance details:

screenshot

Add a new inbound port with the following settings:

  • Protocol TCP
  • Port Range 80
  • Source 0.0.0.0

It should look like this when you’re done:

screenshot

Verify it’s running

Paste the hostname of your aws instance into your browser (eg, http://ec2-54-163-185-45.compute-1.amazonaws.com), and you should see a page like this:

screenshot

Login

If you click the login button, you should see:

screenshot

And then:

screenshot

Activate a repository

Click one of the repositories you have access to, and you should get an “activate now” option:

screenshot

which will take you to your project home screen:

screenshot

Add a .drone.yml file to the root of the repository

In the repository you have chosen (in my case I’m using tleyden/sync_gateway, which is a golang project, and may refer to it later), add a .drone.yml file to the root of the repository with:

1
2
3
4
5
6
build:
  image: golang
  commands:
    - go get
    - go build
    - go test

Commit your change, but do not push to github yet, that will be in the next step.

1
2
$ git add .drone.yml
$ git commit -m "Add drone.yml"

Kickoff a build

Now push your change up to github.

1
$ git push origin master

and in your drone UI you should see a build in progress:

screenshot

when it finishes, you’ll see either a pass or a failure. If you get a failure (which I did), it will look like this:

screenshot

Manually triggering another build

In my case, the above failure was due to a dependency not building. Since nothing else needs to be pushed to the repo to fix the build, I’m just going to manually trigger a build.

On the build failure screen above, there is a Restart button, which triggers a new build.

screenshot

Now it works!

Setup the Drone CLI

I could run this on my OSX workstation, but I decided to run this on a linux docker container. The rest of the steps assume you have spun up and are inside a linux docker container.

1
2
$ curl http://downloads.drone.io/drone-cli/drone_linux_amd64.tar.gz | tar zx
$ install -t /usr/local/bin drone

Go to your Profile page in the drone UI, and click Show Token.

Now set these environment variables

1
2
$ export DRONE_SERVER=http://ec2-54-163-185-45.compute-1.amazonaws.com
$ export DRONE_TOKEN=eyJhbGci...

Query repos

To test the CLI tool works, try the following commands:

1
2
3
4
5
# drone repo ls
couchbase/sync_gateway
tleyden/sync_gateway
# drone repo info tleyden/sync_gateway
tleyden/sync_gateway

Adding Vendoring to a Go Project

Install gvt

After doing some research, I decided to try gvt since it seemed simple and well documented, and integrated well with exiting tools like go get.

1
2
$ export GO15VENDOREXPERIMENT=1
$ go get -u github.com/FiloSottile/gvt

Go get target project to be updated

I’m going to update todolite-appserver to use vendored dependencies for some of it’s dependencies, just to see how things go.

1
$ go get -u github.com/tleyden/todolite-appserver

Vendor dependencies

I’m going to vendor the dependency on kingpin since it has transitive dependencies of it’s own (github.com/alecthomas/units, etc). gvt handles this by automatically pulling all of the transitive dependencies.

1
$ gvt fetch github.com/alecthomas/kingpin

Now my directory structure looks like this:

1
2
3
4
5
6
7
├── main.go
└── vendor
    ├── github.com
    │   └── alecthomas
    ├── gopkg.in
    │   └── alecthomas
    └── manifest

Here is the manifest

gvt list shows the following:

1
2
3
4
5
$  gvt list
github.com/alecthomas/kingpin  https://github.com/alecthomas/kingpin  master 46aba6af542541c54c5b7a71a9dfe8f2ab95b93a
github.com/alecthomas/template https://github.com/alecthomas/template master 14fd436dd20c3cc65242a9f396b61bfc8a3926fc
github.com/alecthomas/units    https://github.com/alecthomas/units    master 2efee857e7cfd4f3d0138cc3cbb1b4966962b93a
gopkg.in/alecthomas/kingpin.v2 https://gopkg.in/alecthomas/kingpin.v2 master 24b74030480f0aa98802b51ff4622a7eb09dfddd

Verify it’s using the vendor folder

I opened up the vendor/github.com/alecthomas/kingpin/global.go and made the following change:

1
2
3
4
5
// Errorf prints an error message to stderr.
func Errorf(format string, args ...interface{}) {
  fmt.Println("CALLED IT!!")
  CommandLine.Errorf(format, args...)
}

Now verify that code is getting compiled and run:

1
2
3
$ go run main.go changesfollower
CALLED IT!!
main: error: URL is empty

(note: export GO15VENDOREXPERIMENT=1 is still in effect in my shell)

Restore the dependency

Before I check in the vendor directory to git, I want to reset it to it’s previous state before I made the above change to the global.go source file.

1
$ gvt restore

Now if I open global.go again, it’s back to it’s original state. Nice!

Add the vendor folder and push

1
2
3
$ git add vendor
$ git commit -m "..."
$ git push origin master

Also, I updated the README to tell users to set the GO15VENDOREXPERIMENT=1 variable:

1
2
3
$ export GO15VENDOREXPERIMENT=1
$ go get -u github.com/tleyden/todolite-appserver
$ todolite-appserver --help

but the instructions otherwise remained the same. If someone tries to use this but forgets to set GO15VENDOREXPERIMENT=1 in Go 1.5, it will still work, it will just use the kingpin dependency in the $GOPATH rather than the vendor/ directory. Ditto for someone using go 1.4 or earlier.

Removing a vendored dependency

As it turns out, I don’t even need kingpin in this project, since I’m using cobra. The kingpin dependency was caused by some leftover code I forgot to cleanup.

To remove it, I ran:

1
2
3
4
$ gvt delete github.com/alecthomas/kingpin
$ gvt delete github.com/alecthomas/template
$ gvt delete github.com/alecthomas/units
$ gvt delete gopkg.in/alecthomas/kingpin.v2

In this case, since it was my only dependency, it was easy to identify the transitive dependencies. In general though it looks like it’s up to you as a user to track down which ones to remove. I filed gvt issue 16 to hopefully address that.
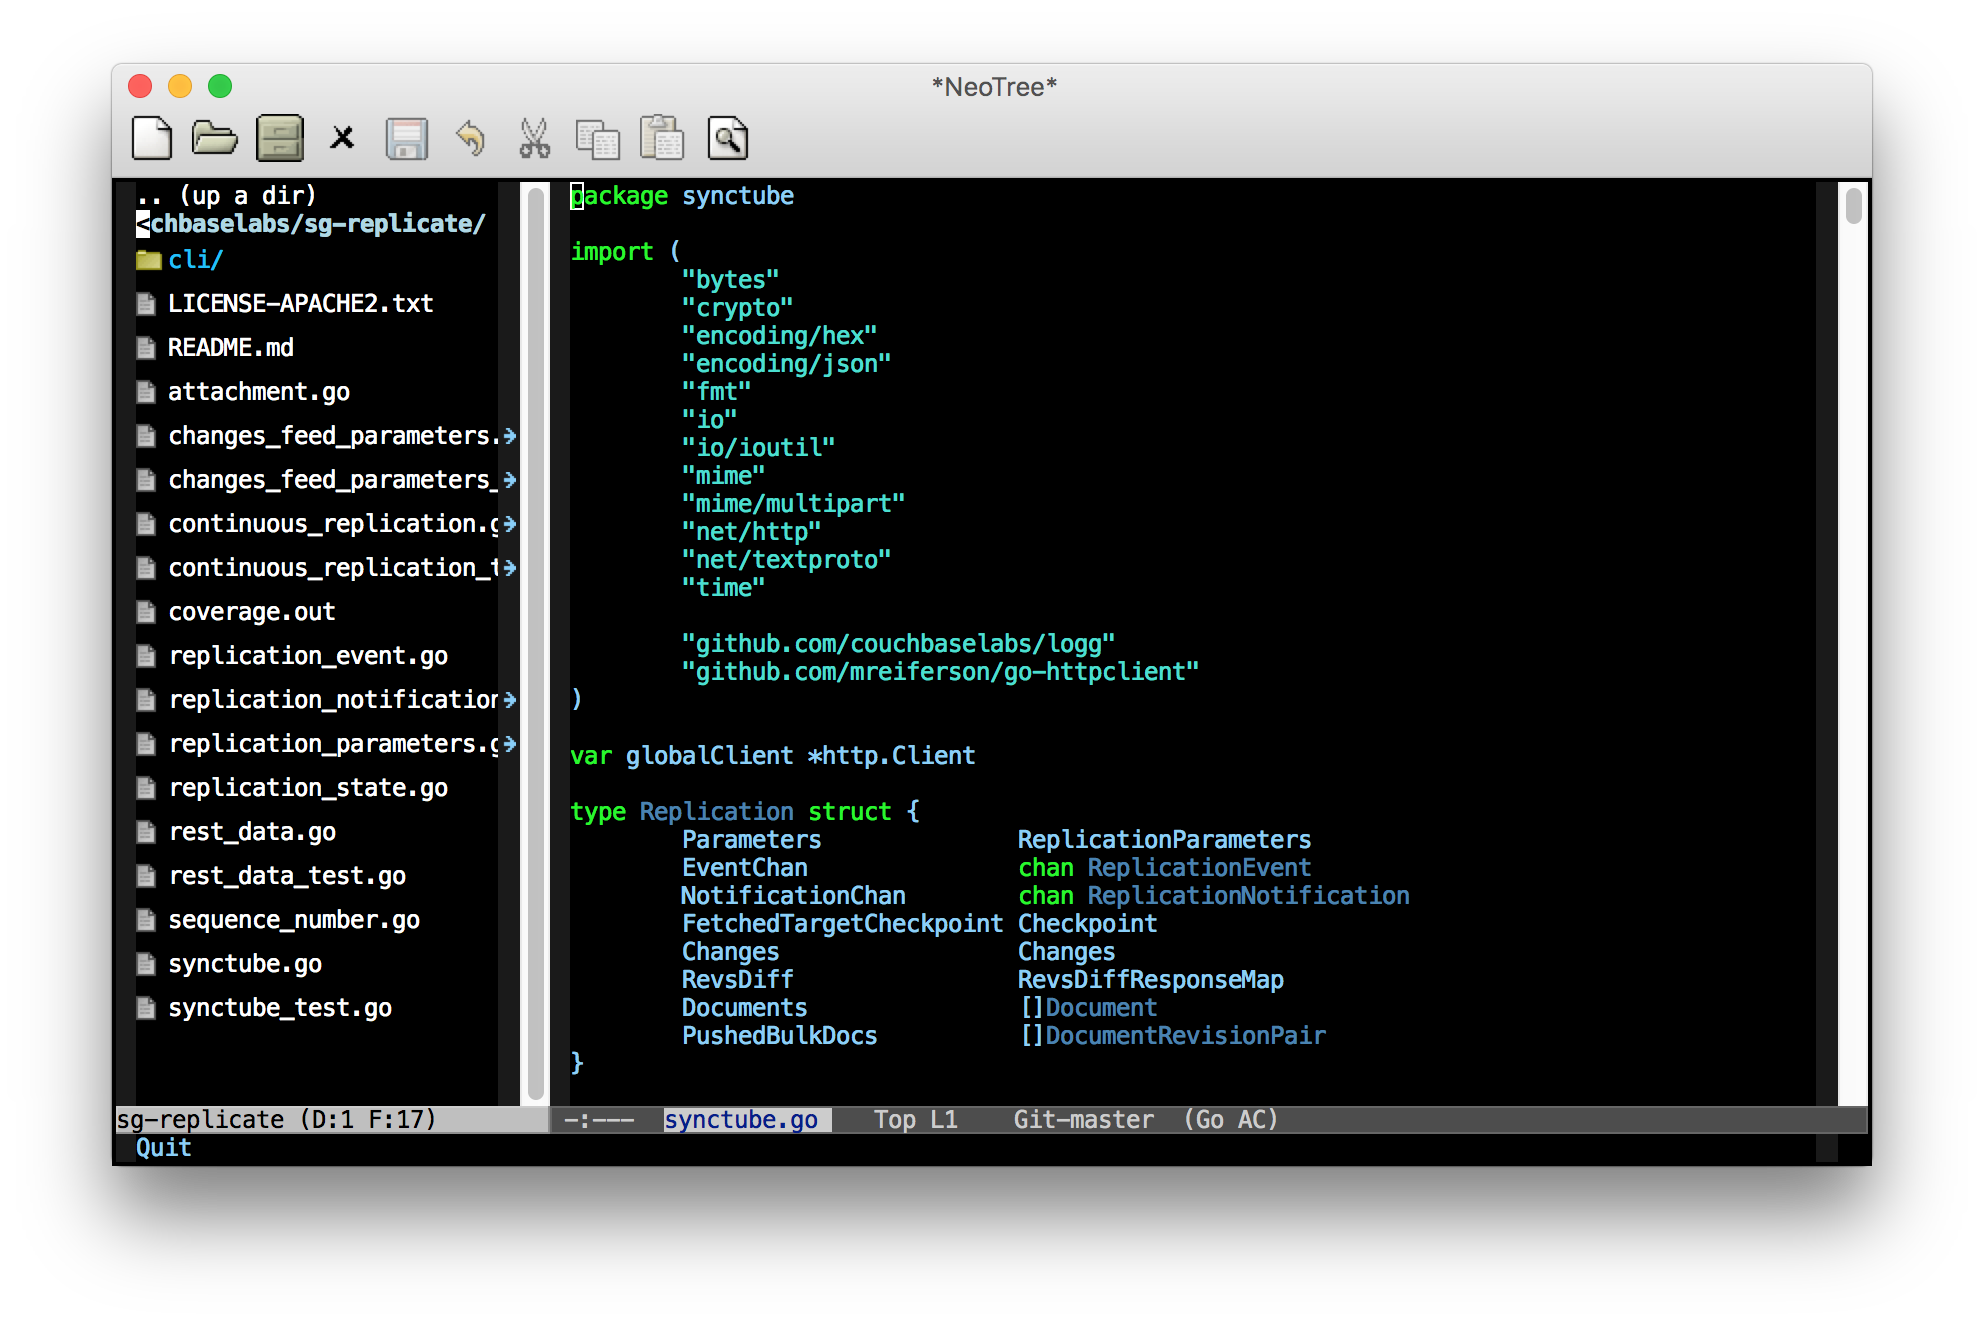
Editor annoyances

I have emacs setup using the steps in this blog post, and I’m running into the following annoyances:

  • When I use godef to jump into the code of vendored dependency, it takes me to source code that lives in the GOPATH, which might be different than what’s under vendor/. Also, if I edit it there, my changes won’t be reflected when I rebuild.
  • I usually search for things in the project via M-x rgrep, but now it’s searching through every repo under vendor/ and returning things I’m not interested in .. since most of the time I only want to search within my project.

Configure Emacs as a Go Editor From Scratch Part 3

This is a continuation from a previous blog post. In this post I’m going to focus on making emacs look a bit better.

Currently:

screenshot

Install a nicer theme

I like the taming-mr-arneson-theme, so let’s install that one. Feel free to browse the emacs themes and find one that you like more.

1
2
$ `mkdir ~/.emacs.d/color-themes`
$ `wget https://raw.githubusercontent.com/emacs-jp/replace-colorthemes/d23b086141019c76ea81881bda00fb385f795048/taming-mr-arneson-theme.el`

Update your ~/emacs.d/init.el to add the following lines to the top of the file:

1
2
(add-to-list 'custom-theme-load-path "/Users/tleyden/.emacs.d/color-themes/")
(load-theme 'taming-mr-arneson t)

Now when you restart emacs it should look like this:

screenshot

## Directory Tree

1
2
$ cd ~/DevLibraries
$ git clone https://github.com/jaypei/emacs-neotree.git neotree

Update your ~/emacs.d/init.el to add the following lines:

1
2
(add-to-list 'load-path "/some/path/neotree")
(require 'neotree)

Open a .go file and the enter M-x neotree-dir to show a directory browser:

screnshot

Ref: NeoTree

Octopress Under Docker

I’m setting up a clean install of El Capitan, and want to get my Octopress blog going. However, I don’t want to install it directly on my OSX workstation — I want to have it contained in a docker container.

Install Docker

That’s beyond the scope of this blog post, but what I ended up doing on my new OSX installation was to:

Run tleyden5iwx/octopress

1
$ docker run -itd -v ~/Documents/blog/:/blog tleyden5iwx/octopress /bin/bash

What’s in ~/Documents/blog/? Basically, the octopress instance I’d setup as described in Octopress Setup Part I.

Bundle install

From inside the docker container:

1
2
# cd /blog/octopress
# bundle install

Edit a blog post

On OSX, open up ~/Documents/blog/source/_posts/path-to-post and make some minor edits

Push source

1
2
3
# git push origin source
Username for 'https://github.com': [enter your username]
Password for 'https://username@github.com': [enter your password]

Generate and push to master

Attempt 1

1
2
3
4
5
# rake generate
rake aborted!
Gem::LoadError: You have already activated rake 10.4.2, but your Gemfile requires rake 0.9.6. Using bundle exec may solve this.
/blog/octopress/Rakefile:2:in `<top (required)>'
(See full trace by running task with --trace) 

I have no idea why this is happening, but I just conceded defeat against these ruby weirdisms, wished I was using Go (and thought about converting my blog to Hugo), and took their advice and prefixed every command thereafter with bundle exec.

Attempt 2

1
2
3
# bundle exec rake generate && bundle exec rake deploy
Username for 'https://github.com': [enter your username]
Password for 'https://username@github.com': [enter your password]

Success!

Setting Up Uniqush With APNS

This walks you through running Uniqush in the cloud (under Docker) and setting up an iOS app to receive messages via APNS (Apple Push Notification Service).

Run Uniqush under Docker

Install Docker components

Config

  • mkdir -p volumes/uniqush
  • wget https://git.io/vgSYM -O volumes/uniqush/uniqush-push.conf

Security note: the above config has Uniqush listening on all interfaces, but depending on your setup you probably want to change that to localhost or something more restrictive.

Docker compose file

Copy and paste this content into docker-compose.yml

1
2
3
4
5
6
7
8
9
10
11
12
13
14
15
16
17

version: '2'

services:
  uniqush:
    container_name: uniqush
    ports:
      - "9898:9898"
    image: tleyden5iwx/uniqush
    entrypoint: uniqush-push
    links:
      - redis
    volumes:
      - ~/docker/volumes/uniqush/uniqush-push.conf:/etc/uniqush/uniqush-push.conf
  redis:
    container_name: redis
    image: redis

Start docker containers

1
$ docker compose up -d

Verify Uniqush is running

Run this curl command outside of the docker container to verify that Uniqush is responding to HTTP requests:

1
2
$ curl localhost:9898/version
uniqush-push 1.5.2

Create APNS certificate

In my case, I already had an app id for my app (com.couchbase.todolite), but push notifications are not enabled, so I needed to enable them:

screenshot

Create a new push cert:

screenshot

Choose the correct app id:

screenshot

Generate CSR according to instructions in keychain:

screenshot

This will save a CSR on your file system, and the next wizard step will ask you to upload this CSSR and generate the certificate. Now you can download it:

screenshot

Double click the downloaded cert and it will be added to your keychain.

This is where I got a bit confused, since I had to also download the cert from the app id section — go to the app id and hit “Edit”, then download the cert and double click it to add to your keychain. (I’m confused because I thought these were the same certs and this second step felt redundant)

screenshot

Create and use provisioning profile

Go to the Provisioning Profiles / Development section and hit the “+” button:

screenshot

Choose all certs and all devices, and then give your provisioning profile an easy to remember name.

screenshot

Download this provisioning profile and double click it to install it.

In xcode under Build Settings, choose this provisioning profile:

screenshot

Register for push notifications in your app

Add the following code to your didFinishLaunchingWithOptions::

1
2
3
4
5
6
7
8
9
10
11
12
13
14
15
16
17
18
19
20
- (BOOL)application:(UIApplication *)application didFinishLaunchingWithOptions:(NSDictionary *)launchOptions {
    
    // Register for push notifications
    if ([application respondsToSelector:@selector(isRegisteredForRemoteNotifications)])
    {
        // iOS 8 Notifications
        [application registerUserNotificationSettings:[UIUserNotificationSettings settingsForTypes:(UIUserNotificationTypeSound | UIUserNotificationTypeAlert | UIUserNotificationTypeBadge) categories:nil]];
        
        [application registerForRemoteNotifications];
    }
    else
    {
        // iOS < 8 Notifications
        [application registerForRemoteNotificationTypes:
         (UIRemoteNotificationTypeBadge | UIRemoteNotificationTypeAlert | UIRemoteNotificationTypeSound)];
    }

    // rest of your code goes here ...

}

And the following callback methods which will be called if remote notification is successful:

1
2
3
4
5
6
7
8
9
10
11
12
13
14
- (void)application:(UIApplication *)app didRegisterForRemoteNotificationsWithDeviceToken:(NSData *)deviceToken
{
    
    NSString *deviceTokenStr = [NSString stringWithFormat:@"%@",deviceToken];
    NSLog(@"didRegisterForRemoteNotificationsWithDeviceToken, Device token: %@", deviceTokenStr);
    
    NSString* deviceTokenCleaned = [[[[deviceToken description]
                                      stringByReplacingOccurrencesOfString: @"<" withString: @""]
                                     stringByReplacingOccurrencesOfString: @">" withString: @""]
                                    stringByReplacingOccurrencesOfString: @" " withString: @""];
    
     NSLog(@"didRegisterForRemoteNotificationsWithDeviceToken, Cleaned device token token: %@", deviceTokenCleaned);

}

and this callback which will be called if it’s not unsuccessful:

1
2
3
4
5
- (void)application:(UIApplication *)app didFailToRegisterForRemoteNotificationsWithError:(NSError *)err
{
    NSString *str = [NSString stringWithFormat: @"Error: %@", err];
    NSLog(@"Error registering device token.  Push notifications will not work%@", str);
}

If you now run this app on a simulator, you can expect an error like Error registering device token. Push notifications will not workError.

Run the app on a device you should see a popup dialog in the app asking if it’s OK to receive push notifications, and the following log messages in the xcode console:

1
2
didRegisterForRemoteNotificationsWithDeviceToken, Device token: <281c8710 1b029fdb 16c8e134 39436336 116001ce bf6519e6 8edefab5 23dab4e9>
didRegisterForRemoteNotificationsWithDeviceToken, Cleaned device token token: 281c87101b029fdb16c8e13439436336116001cebf6519e68edefab523dab4e9

Export APNS keys to .PEM format

Open keychain, select the login keychain and the My Certificates category:

screenshot

  • Right click on the certificate (not the private key) “Apple Development Push Services: (your app id)”
  • Choose Export “Apple Development Push Services: (your app id)″.
  • Save this as apns-prod-cert.p12 file somewhere you can access it.
  • When it prompts you for a password, leave it blank (or add one if you want, but this tutorial will assume it was left blank)
  • Repeat with the private key (in this case, TodoLite Push Notification Cert) and save it as apns-prod-key.p12.

Now they need to be converted from .p12 to .pem format.

1
2
3
$ openssl pkcs12 -clcerts -nokeys -out apns-prod-cert.pem -in apns-prod-cert.p12
Enter Import Password: <return>
MAC verified OK
1
2
3
4
$ openssl pkcs12 -nocerts -out apns-prod-key.pem -in apns-prod-key.p12
Enter Import Password:
MAC verified OK
Enter PEM pass phrase: hello <return>

Remove the PEM passphrase:

1
2
3
$ openssl rsa -in apns-prod-key.pem -out apns-prod-key-noenc.pem
Enter pass phrase for apns-prod-key.pem: hello
writing RSA key

Add PEM files to Uniqush docker container

When you call the Uniqush REST API to add a Push Service Provider, it expects to find the PEM files on it’s local file system. Use the following commands to get these files into the running container in the /tmp directory:

1
2
3
$ `container=$(docker ps | grep -i uniqush-push | awk '{print $1}')`
$ docker cp /tmp/apns-prod-cert.pem $container:/tmp/apns-prod-cert.pem
$ docker cp /tmp/apns-prod-key-noenc.pem $container:/tmp/apns-prod-key-noenc.pem

Create APNS provider in Uniqush via REST API

1
2
3
4
5
$ curl -v http://localhost:9898/addpsp -d service=myservice \
                             -d pushservicetype=apns \
                     -d cert=/tmp/apns-prod-cert.pem \
                     -d key=/tmp/apns-prod-key-noenc.pem \
                     -d sandbox=true

(Note: I’m using a development cert, but if this was a distribution cert you’d want to use sandbox=false)

You should get a 200 OK response with:

1
[AddPushServiceProvider][Info] 2016/02/03 20:35:29 From=24.23.246.59:59447 Service=myservice PushServiceProvider=apns:9f49c9c618c97bebe21bea159d3c7a8577934bdf00 Success!

Add Uniqush subscriber

Using the cleaned up device token from the previous step 281c87101b029fdb16c8e13439436336116001cebf6519e68edefab523dab1e9, create a subscriber with the name mytestsubscriber via:

1
2
3
4
$ curl -v http://localhost:9898/subscribe -d service=myservice \
                                             -d subscriber=mytestsubscriber \
                       -d pushservicetype=apns \
                       -d devtoken=281c87101b029fdb16c8e13439436336116001cebf6519e68edefab523dab1e9 

You should receive a 200 OK response with:

1
[Subscribe][Info] 2016/02/03 20:43:21 From=24.23.246.59:60299 Service=myservice Subscriber=mytestsubscriber PushServiceProvider=apns:9f49c9c618c97bebe21bea159d3c7a8577934bdf00 DeliveryPoint=apns:2cbecd0798cc6731d96d5b0fb01d813c7c9a83af00 Success!

Push a test message

The moment of truth!

First, you need to either background your app by pressing the home button, or add some code like this so that an alert will be shown if the app is foregrounded.

1
2
3
$ curl -v http://localhost:9898/push -d service=myservice \
                                        -d subscriber=mytestsubscriber \
                  -d msg=HelloWorld

You should get a 200 OK response with:

1
2
[Push][Info] 2016/02/03 20:46:08 RequestId=56b26710-INbW8UWMUONtH8Ttddd2Qg== From=24.23.246.59:60634 Service=myservice NrSubscribers=1 Subscribers="[mytestsubscriber]"
[Push][Info] 2016/02/03 20:46:09 RequestID=56b26710-INbW8UWMUONtH8Ttddd2Qg== Service=myservice Subscriber=mytestsubscriber PushServiceProvider=apns:9f49c9c618c97bebe21bea159d3c7a8577934bdf00 DeliveryPoint=apns:2cbecd0798cc6731d96d5b0fb01d813c7c9a83af MsgId=apns:apns:9f49c9c618c97bebe21bea159d3c7a8577934bdf-1 Success!

And a push notification on the device!

screenshot

References

CUDA 7.5 on AWS GPU Instance Running Ubuntu 14.04

Launch stock Ubuntu AMI

  • Launch ami-d05e75b8
  • Choose a GPU instance type: g2.2xlarge or g2.8xlarge
  • Increase the size of the storage (this depends on what else you plan to install, I’d suggest at least 20 GB)

SSH in

1
$ ssh ubuntu@<instance ip>

Install CUDA repository

1
2
$ wget http://developer.download.nvidia.com/compute/cuda/repos/ubuntu1404/x86_64/cuda-repo-ubuntu1404_7.5-18_amd64.deb
$ sudo dpkg -i cuda-repo-ubuntu1404_7.5-18_amd64.deb

Update APT

1
2
3
4
5
6
7
$ sudo apt-get update
$ sudo apt-get upgrade -y
$ sudo apt-get install -y opencl-headers build-essential protobuf-compiler \
    libprotoc-dev libboost-all-dev libleveldb-dev hdf5-tools libhdf5-serial-dev \
    libopencv-core-dev  libopencv-highgui-dev libsnappy-dev libsnappy1 \
    libatlas-base-dev cmake libstdc++6-4.8-dbg libgoogle-glog0 libgoogle-glog-dev \
    libgflags-dev liblmdb-dev git python-pip gfortran

You will get a dialog regarding the menu.lst file, just choose the default option it gives you.

Do some cleanup:

1
$ sudo apt-get clean

DRM module workaround

1
$ sudo apt-get install -y linux-image-extra-`uname -r` linux-headers-`uname -r` linux-image-`uname -r`

For an explanation of why this is needed, see Caffe on EC2 Ubuntu 14.04 Cuda 7 and search for this command.

Install CUDA

1
2
$ sudo apt-get install -y cuda
$ sudo apt-get clean

Verify CUDA

1
$ nvidia-smi

You should see:

1
2
3
4
5
6
7
8
9
10
11
12
13
14
15
16
+------------------------------------------------------+
| NVIDIA-SMI 352.63     Driver Version: 352.63         |
|-------------------------------+----------------------+----------------------+
| GPU  Name        Persistence-M| Bus-Id        Disp.A | Volatile Uncorr. ECC |
| Fan  Temp  Perf  Pwr:Usage/Cap|         Memory-Usage | GPU-Util  Compute M. |
|===============================+======================+======================|
|   0  GRID K520           Off  | 0000:00:03.0     Off |                  N/A |
| N/A   30C    P0    36W / 125W |     11MiB /  4095MiB |      0%      Default |
+-------------------------------+----------------------+----------------------+

+-----------------------------------------------------------------------------+
| Processes:                                                       GPU Memory |
|  GPU       PID  Type  Process name                               Usage      |
|=============================================================================|
|  No running processes found                                                 |
+-----------------------------------------------------------------------------+

Make sure kernel module and devices are present:

1
2
3
4
5
6
ubuntu@ip-10-33-135-228:~$ lsmod | grep -i nvidia
nvidia               8642880  0
drm                   303102  1 nvidia
ubuntu@ip-10-33-135-228:~$ ls -alh /dev | grep -i nvidia
crw-rw-rw-  1 root root    195,   0 Nov 23 01:59 nvidia0
crw-rw-rw-  1 root root    195, 255 Nov 23 01:58 nvidiactl

References

Running Neural Style on an AWS GPU Instance

These instructions will walk you through getting neural-style up and running on an AWS GPU instance.

Spin up CUDA-enabled AWS instance

Follow these instructions to install CUDA 7.5 on AWS GPU Instance Running Ubuntu 14.04.

SSH into AWS instance

1
$ ssh ubuntu@<instance-ip>

Install Docker

1
2
$ sudo apt-get update && sudo apt-get install curl
$ curl -sSL https://get.docker.com/ | sh

As the post-install message suggests, enable docker for non-root users:

1
$ sudo usermod -aG docker ubuntu

Verify correct install via:

1
$ sudo docker run hello-world

Mount GPU devices

Mount

1
2
3
$ cd /usr/local/cuda/samples/1_Utilities/deviceQuery
$ sudo make
$ sudo ./deviceQuery

You should see something like this:

1
2
3
4
5
6
7
8
9
10
11
12
./deviceQuery Starting...

 CUDA Device Query (Runtime API) version (CUDART static linking)

Detected 1 CUDA Capable device(s)

Device 0: "GRID K520"
  CUDA Driver Version / Runtime Version          6.5 / 6.5
  ... snip ...

deviceQuery, CUDA Driver = CUDART, CUDA Driver Version = 6.5, CUDA Runtime Version = 6.5, NumDevs = 1, Device0 = GRID K520
Result = PASS

Verify: Find all your nvidia devices

1
$ ls -la /dev | grep nvidia

You should see:

1
2
3
crw-rw-rw-  1 root root    195,   0 Oct 25 19:37 nvidia0
crw-rw-rw-  1 root root    195, 255 Oct 25 19:37 nvidiactl
crw-rw-rw-  1 root root    251,   0 Oct 25 19:37 nvidia-uvm

Start Docker container

1
2
$ export DOCKER_NVIDIA_DEVICES="--device /dev/nvidia0:/dev/nvidia0 --device /dev/nvidiactl:/dev/nvidiactl --device /dev/nvidia-uvm:/dev/nvidia-uvm"
$ sudo docker run -ti $DOCKER_NVIDIA_DEVICES kaixhin/cuda-torch /bin/bash

Re-install CUDA 7.5 in the Docker container

As reported in the Torch7 Google Group and in Kaixhin/dockerfiles, there is an API version mismatch with the docker container and the host’s version of CUDA.

The workaround is to re-install CUDA 7.5 via:

1
2
3
4
5
6
7
8
9
10
11
12
13
$ wget http://developer.download.nvidia.com/compute/cuda/repos/ubuntu1404/x86_64/cuda-repo-ubuntu1404_7.5-18_amd64.deb
$ sudo dpkg -i cuda-repo-ubuntu1404_7.5-18_amd64.
deb
$ sudo apt-get update
$ sudo apt-get upgrade -y
$ sudo apt-get install -y opencl-headers build-essential protobuf-compiler \
    libprotoc-dev libboost-all-dev libleveldb-dev hdf5-tools libhdf5-serial-dev \
    libopencv-core-dev  libopencv-highgui-dev libsnappy-dev libsnappy1 \
    libatlas-base-dev cmake libstdc++6-4.8-dbg libgoogle-glog0 libgoogle-glog-dev \
    libgflags-dev liblmdb-dev git python-pip gfortran
$ sudo apt-get clean
$ sudo apt-get install -y linux-image-extra-`uname -r` linux-headers-`uname -r` linux-image-`uname -r`
$ sudo apt-get install -y cuda

Verify CUDA inside docker container

Running:

1
$ nvidia-smi 

Should show info about the GPU driver and not return any errors.

Running this torch command:

1
$ th -e "require 'cutorch'; require 'cunn'; print(cutorch)"

Should produce this output:

1
2
3
4
5
{
  getStream : function: 0x4054b760
  getDeviceCount : function: 0x408bca58
  .. etc
}

Install neural-style

The following should be run inside the docker container:

1
2
3
$ apt-get install -y wget libpng-dev libprotobuf-dev protobuf-compiler
$ git clone --depth 1 https://github.com/jcjohnson/neural-style.git
$ /root/torch/install/bin/luarocks install loadcaffe

Download models

1
2
$ cd neural-style
$ sh models/download_models.sh

Run neural style

First, grab a few images to test with

1
2
3
$ mkdir images
$ wget https://upload.wikimedia.org/wikipedia/commons/thumb/e/ea/Van_Gogh_-_Starry_Night_-_Google_Art_Project.jpg/1280px-Van_Gogh_-_Starry_Night_-_Google_Art_Project.jpg -O images/vangogh.jpg
$ wget http://exp.cdn-hotels.com/hotels/1000000/10000/7500/7496/7496_42_z.jpg -O images/hotel_del_coronado.jpg

Run it:

1
$ th neural_style.lua -style_image images/vangogh.jpg -content_image images/hotel_del_coronado.jpg

CuDNN (optional)

CuDNN can potentially speed things up.

download cuDNN

Install via:

1
2
3
4
5
tar -xzvf cudnn-7.0-linux-x64-v3.0-prod.tgz
cd cuda/
sudo cp lib64/libcudnn* /usr/local/cuda-7.5/lib64/
sudo cp include/cudnn.h /usr/local/cuda-7.5/include
export LD_LIBRARY_PATH=$LD_LIBRARY_PATH:/usr/local/cuda-7.5/lib64/

Install the torch bindings for cuDNN:

1
luarocks install cudnn

References

  • Neural-Style INSTALL.md
  • ami-84c787ee — this AMI has everything pre-installed, however it is installed on the host rather than under docker, which was due to time constraints.

Running the Sync Gateway Amazon AMI

How to run the Couchbase Sync Gateway AWS AMI

Kick off AWS instance

  • Browse to the Sync Gateway AMI in the AWS Marketplace
  • Click Continue
  • Change all ports to “MY IP” except for port 4984
  • Make sure you choose a key that you have locally

SSH in and start Sync Gateway

  • Go to the AWS console, find the EC2 instance, and find the instance public ip address. It should look like this: ec2-54-161-201-224.compute-1.amazonaws.com. The rest of the instructions will refer to this as
  • ssh ec2-user@<instance public ip> (this should let you in without prompting you for a password. if not, you chose a key when you launched that you don’t have locally)
  • Start the Sync Gateway with this command:
1
/opt/couchbase-sync-gateway/bin/sync_gateway -interface=0.0.0.0:4984 -url=http://localhost:8091 -bucket=sync_gateway -dbname=sync_gateway
  • You should see output like this:
1
2
3
4
5
6
7
8
9
10
2015-11-03T19:37:05.384Z ==== Couchbase Sync Gateway/1.1.0(28;86f028c) ====
2015-11-03T19:37:05.384Z Opening db /sync_gateway as bucket "sync_gateway", pool "default", server <http://localhost:8091>
2015-11-03T19:37:05.384Z Opening Couchbase database sync_gateway on <http://localhost:8091>
2015/11/03 19:37:05  Trying with selected node 0
2015-11-03T19:37:05.536Z Using default sync function 'channel(doc.channels)' for database "sync_gateway"
2015-11-03T19:37:05.536Z     Reset guest user to config
2015-11-03T19:37:05.536Z Starting profile server on
2015-11-03T19:37:05.536Z Starting admin server on 127.0.0.1:4985
2015-11-03T19:37:05.550Z Starting server on localhost:4984 ...

Verify via curl

From your workstation:

1
$ curl http://<instance public ip>:4984/sync_gateway/

You should get a response like:

1
{"committed_update_seq":1,"compact_running":false,"db_name":"sync_gateway","disk_format_version":0,"instance_start_time":1446579479331843,"purge_seq":0,"update_seq":1}

Customize configuration

For more advanced Sync Gateway configuration, you will want to create a JSON config file on the EC2 instance itself and pass that to Sync Gateway when you launch it, or host your config JSON on the internet somewhere and pass Sync Gateway the URL to the file.

View Couchbase Server UI

In order to login to the Couchbase Server UI, go to :8091 and use:

  • Username: Administrator
  • Password: <aws instance id, eg: i-8a9f8335>